ADMIN: File Upload Options
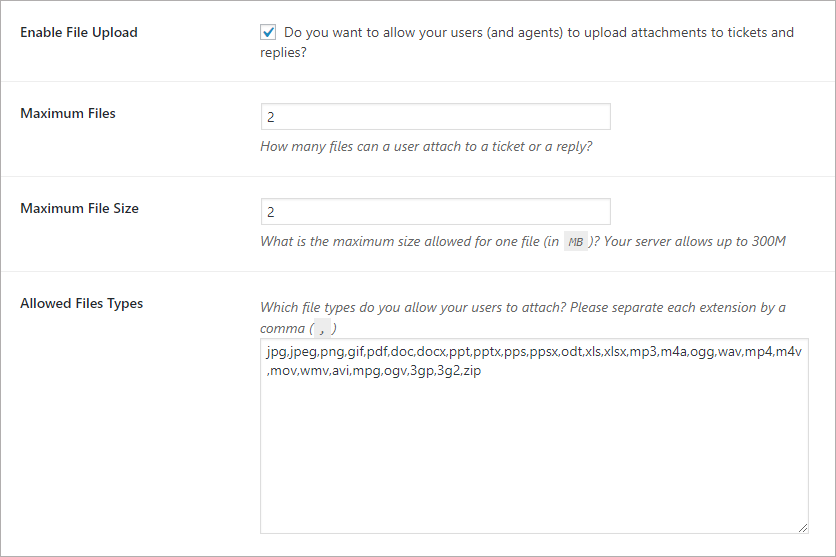
File upload options allow you to control the number of files, the type of files, the size of files that can be uploaded with a ticket or ticket reply and what type of uploads are allowed (default browser upload or drag-and-drop). An agent can even turn off file uploads completely.
Set File Upload Options
- Go to the TICKETS->SETTINGS->FILE UPLOAD tab
- Turn on or off items as needed in that section
- Don’t forget to click the SAVE CHANGES button!
About Drag-n-Drop File Uploads
Allowing a user to drag and drop one or more files into the ticket for uploading is a common expectation these days. However, it is an intensive Javascript process and has potential for conflicting with other Javascript processes running in the browser. As such, we have opted to disable it by default. However, you can enable it at any time.
You can also enable the option to paste images from the clipboard using CTRL-V (or CMD-V). When this option is enabled, the user or agent can use the CTRL-V key combination whenver the mouse cursor is over the file uploads “drop-zone”.
File Locations
All files are stored on the server where your WordPress installation is located. Generally, files are stored in the /wp-content/uploads/awesome-support/ticket_nnnn where nnnn is the ticket number.
If you have the Filestack premium add-on installed then files are stored on the Filestack servers.
If you have the E-mail Support premium add-on installed then files sent via email will respect these settings. Any files violating these settings will be dropped from the ticket and will not be stored at all. However the names of the dropped files will be noted on the ticket but the actual contents of the file will not be accessible.
See Also

