ADMIN: Configure Products
Awesome Support has the ability to support multiple products. However, to keep things simple and ensure that the plugin is ready to be used immediately after installation, the default options are set so that the user is not asked for a product when they fill out a ticket.
But you can turn on support for multiple products and create a list of products that the user can choose from. There are two ways to turn on support for multiple products.
- If you ran the configuration wizard at the time the plugin was installed you were offered the option to turn Multiple Products support. OR
- Go to the TICKETS->SETTINGS->PRODUCTS MANAGEMENT tab and turn on the checkbox next to the MULTIPLE PRODUCTS option. Don’t forget to scroll down to the bottom and click the SAVE CHANGES button.
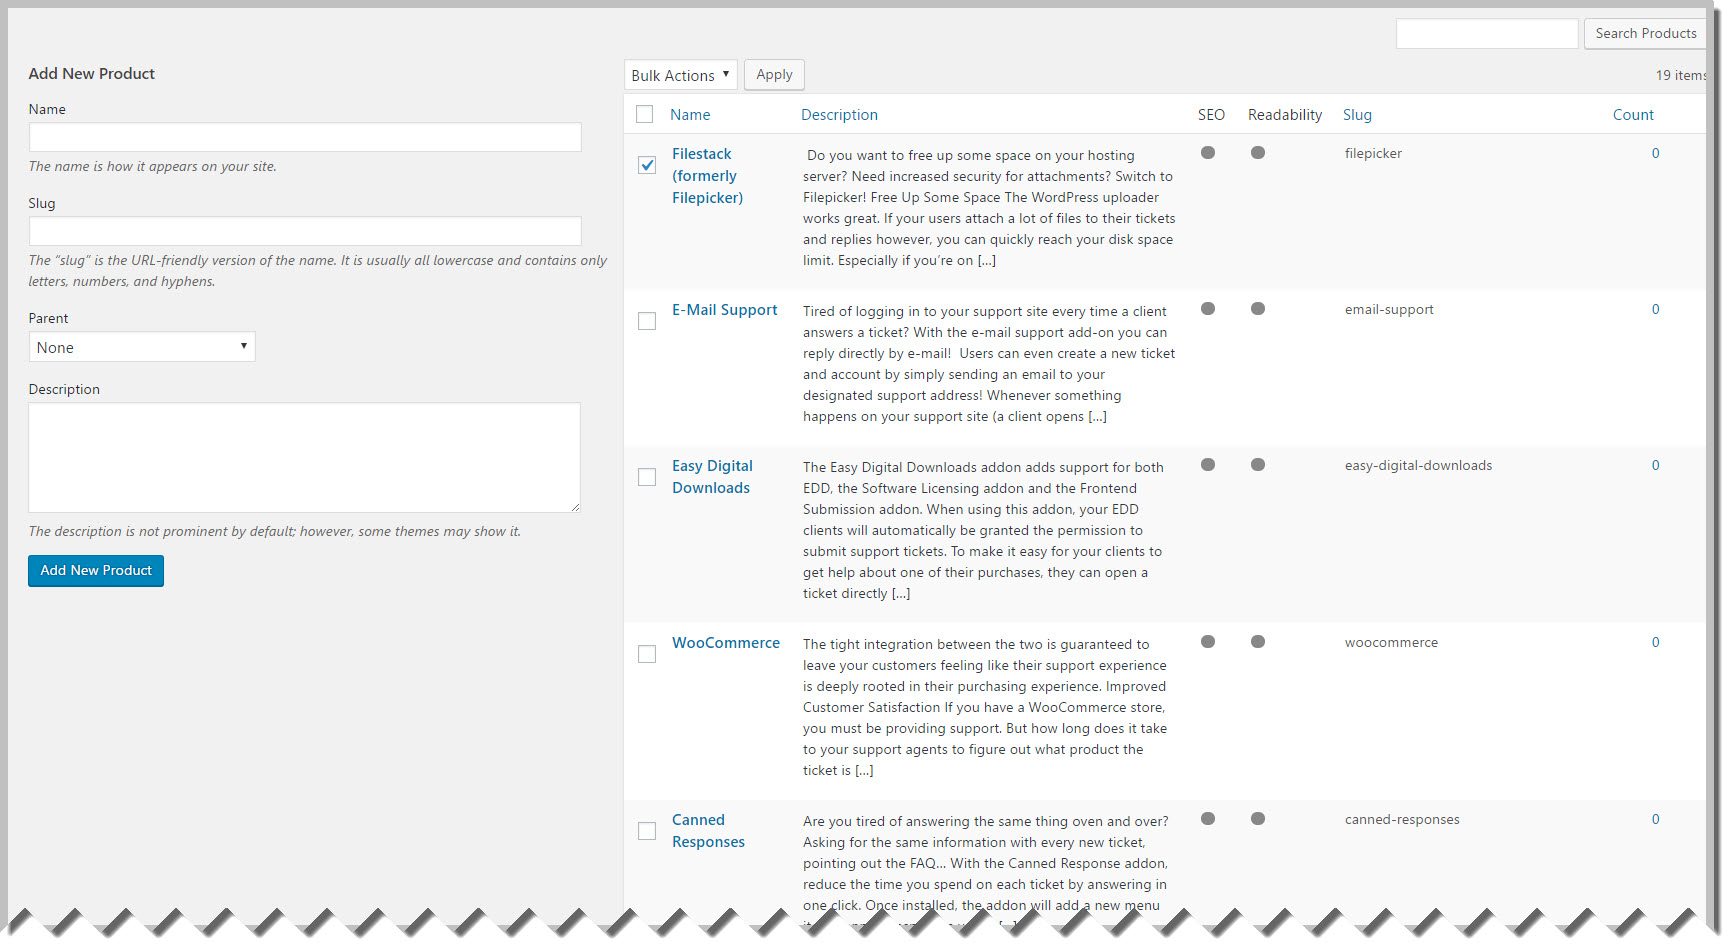
After you turn on support for multiple products there will be a new menu option under tickets called Products. You can add a new product by going to TICKETS->PRODUCTS.
Add / Edit / Delete Products
- To add a product, just fill out the name and, if you like a description of the product. Then click the Add New Product button. This will add the product to the list on the right side of the screen.
- To delete a product, you have two choices:
- In the product list on the right side of the screen, hover over the link under the NAME column. A series of links will show up – just click the DELETE link.
- Click the check box next to the product and then select DELETE from the Bulk Options drop-down at the top of the list. Click the APPLY button to delete the selected product(s).
- To update a product, just click on the link under the NAME column. This will take you to a new screen where you can make your changes. You can apply your changes by clicking the UPDATE button at the bottom of the screen.
Syncing Products with EDD and WooCommerce
You can configure your system to automatically sync your products with EDD and WC. Read more here.
See Also
Smart Chat
Smart Replies add-on Chat
X
Search
